1 - Introduction
As the new release of SharePoint 2010 was launched last week, I am updating this post that was written for the beta version, but I let the previous post as an archive at
the end of this page.
- Development benefits (the "why" part of the post)
In order this tutorial do not require any software purchase for a developer that wants to be familiar with the new release of SharePoint 2010: - I chose to take advantage of testing the new version of SharePoint by testing in the same time the Windows 2008 Server R2 OS because Microsoft provides presently an 180 days evaluation version of it.
- As you certainly know, SharePoint 2010 requires a 64 bits OS to run.
Therefore, I have chosen to create the Virtual Machine with VMware because it is to date the only way of making run an 64 bit OS guest on a 32 bits OS host.
you can actually create a Virtual Machine running Windows 2008 Server R2 64 bits on a 32 bits host by using the free version of VMware:
VMware player 3.0.
You can download this software after registration at:
http://downloads.vmware.com/d/info/desktop_downloads/vmware_player/3_0
As usual I will do my best to supply a step by step tutorial as detailed as possible which demonstrates how to install 2010 SharePoint on Windows server 2008 R2.
- Environment for this SharePoint 2010 installation:
The environment I propose to mount in this tutorial is a development environment that uses a SharePoint Server 2010 Farm installation on a single computer using several local service accounts in order to be compliant with the least privilege administration policy.
The SharePoint 2010 content databases will run on a SQLServer 2008 Standard Edition Database Engine.
2 Creating the Virtual Machine
2.1 Download Windows Server 2008 R2 Evaluation

Open VMWare and Select "New Virtual Machine"

The new virtual machine wizard is opening

Choose the option "Installer disc image file " and browse to refer the previously downloaded image of the Windows 2008 Server R2.
The wizard will detect automatically the OS version and will start easy install.

The wizard will retrieve automatically your user account.
Don't provide any product key you don't need any for this evaluation version, but take time to provide a password because this account will be your Administrator account of your new Virtual Machine and using an Administrator account that has not a password will lead to many problems when configuring your machine and more trouble when working with SharePoint 2010.

Click OK to the warning message

Choose your Virtual machine name and location.

On this screen let the default values

The Wizard summarize your settings but you can still change some by clicking "Customize Hardware...". Especially the RAM allocated to the Virtual Machine.


When you click "Finish", the installation begins by loading the files.

Then, you have to choose the version of your Operating System.
Do not choose a Web Server version otherwise you will not be able to add an "Application Server" role to the server later.
Choose the Full Installation of the Enterprise Version.


The Easy install will install the OS automatically and in my case it did it in approximately 30 minutes!


Then you can access to your new server. You will see the "Initial Configuration tasks".
After you have completed the installation of Windows Server® 2008 R2, and before you deploy the new server in your enterprise, some configuration is required to identify the computer to other computing resources on your network, secure the computer, enable administrators to perform tasks on the computer, and customize the computer by adding server roles and features.
You can complete these tasks by using commands in the Initial Configuration Tasks window, which opens immediately after the operating system installation is complete.
The Initial Configuration Tasks window opens at each startup, unless the Do not show this window at logon check box is selected.
If you want to open this windows manually run this command:
C:\Windows\System32\Oobe.exe

3 Configuring the server - Standard Configuration Operations
3.1 Hardware Acceleration
In order to accelerate your Virtual Machine you have to perform the following operations :
Right click your desktop and choose "Screen resolution".
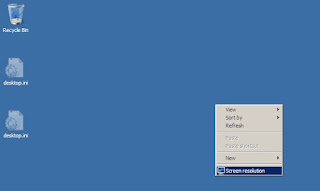
Then, click
Troubleshoot tab
Change Settings button
You will access to the "Display Adapter Troubleshooter" dialog.
Set the cursor to the Full position.

3.2 Windows Activating
Go back to the "Initial Configuration tasks" windows and we are going to go through the standard configuration operations easily because the windows lits them.
Be sure the Virtual Machine has an Internet Access.

We have to activate Windows in order to take advantage of the 180 days of the evaluation process.
Click on the "Activate Windows" link.

Do not look for any product key, as said before, you do not need any, just click next.

The activation will be done automatically through Internet. You will notice then the activation number and the number of days remaining on the bottom right corner of the desktop.

3.3 Changing Computer Name
Now, click the "Provide computer name and domain" link,then set your new Virtual machine name.

3.4 Downloading Updates
Click the "Download and install updates link" then turn on automatic updates, and proceed to the latest updates installation.


i


Then restart the Virtual machine.

3.5 Disabling Internet explorer Enhanced Security
To disable Enhanced Security Configuration to specific users by using a computer running Windows Server 2008
- Click Start, point to Administrative Tools, and then click Server Manager.
- If the User Account Control dialog box appears, confirm that the action it displays is what you want, and then click Continue.
- Under Security Summary, click Configure IE ESC.
- Under Administrators, click On (Recommended) or Off, depending on your desired configuration.
- Under Users, click On (Recommended) or Off, depending on your desired configuration.
- Click OK.
- Restart Internet Explorer to apply Enhanced Security Configuration.

G


4 Configuring the server - Configuration Operations for SharePoint (MOSS 2007 or SharePoint 2010)
4.1 Adding Server Roles and Roles Services - Application Server - Web Server
On the Initial configuration task windows, click "Add Roles"
The "Add Roles" Wizard is opening.
Check the check box for Application Server.
The wizard opens a modal dialog for the Required Features

Just click the "Add Required Features" button.
You are taken to and intermediate dialog. Click "Next" to go to the "Role Services" dialogs.
Click "Next"

On the "Role Services" dialog, select the followings :
.Net Framework 3.5.1
Web Server (IIS) Support
TCP Port Sharing
HTTP Activation
TCP Activation
Named Pipes Activation

Then Click "Next"
You are taken to an the intermediate page for the Web Server (IIS) Role

Click "Next"
The Select Role Services for Web Server (IIS) Role is displaying, but just let the default options.

Click "Next" to access the confirmation dialog

Then click "Install" and the Roles and Features are being installed
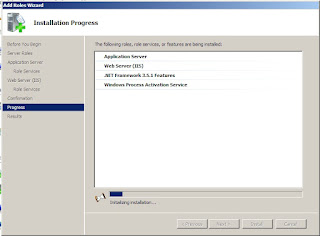
Check the "Installation Result" dialog and close it.

4.1 Adding Desktop Experience Feature
It would be interesting for a development machine to be able to use the Windows Photo Viewer in order to check some screenshots taken during configuration phases, or when wanting to report an issue. To be able to use this feature of Windows server 2008 R2 you have to activate the Desktop Experience feature.
Go back to the "Initial Configuration tasks" window and click "Add feature", then locate "Desktop Experience" check box and check it.
5 Installing SQL Server 2008
For these operations I let you consult one of my previous post that explains the same for Windows 2003 Server. The operations are exactly the same.
Integrating Reporting Services 2008 with SharePoint 2007 Step 1 - SQL Server 2008 Installation
6 Downloading the Microsoft SharePoint Server 2010 new release
Go to this page to download the Microsoft SharePoint Server 2010. You have to register to access to the download.
Choose the SharePoint Server 2010 Entreprise Client Access License features or SharePoint Server 2010 for Internet Sites, Entreprise, it is the same product, but the Entreprise version will give you all the SharePoint 2010 features.
You will notice that a link is available toward the
7 If you have the SharePoint 2010 Beta version installed on this machine
If you have the previous SharePoint 2010 Beta version installed on this machine, uninstall it and uninstall also the Microsoft "Geneva" Framework,
As precised by Micorsoft :
"If you have Microsoft "Geneva" Framework installed, you must uninstall it before you install the Windows Identity Foundation (WIF)."7 Configuring the server - Configuration Operations for SharePoint 2010
8 Installing the manual Prerequistes Softawre
8.1 Downloading and installing SQL Server 2008 SP1
First, we have to update the previously installed SQL Server with the SP1 downlodable at :
Do not forget to choose the x64 package
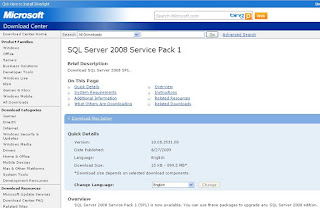
Here is the package after the download

and the first installation screenshot

8.2 Downloading and installing Cumulative update package 2 for SQL Server 2008 Service Pack 1
Then, we have to install the Cumulative Update package 2 for SQL Server 2008 Service Pack 1. We also could install a later Cummulative Update, except the 3 as Microsoft precises it :
"We do not recommend that you use CU3 or CU4, but instead CU2, CU5, or a later CU than CU5."
Follow the regsitration process. You will be provided an auto extractable package that needs a password and the appropriate password.
Here is the screenshot after all the process
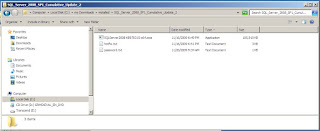
and the first installation screenshot

8.3 Downloading and installing SQL Server 2008 Analysis Services ADODM.NET
For ending with the products related to SQLServer 2008 download and install the SQL Server 2008 Analysis Services ADODM.NET. This is normally installed by the prerequistes installation of SharePoint 2010, but I had issues letting the SharePoint 2010 wizard install it, so I prefer to do it manually.
Here is the direct link to the download:
Here is the screenshot after the download.

And the first screenshot
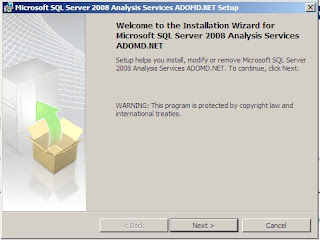
8.4 QFE for Sharepoint issues - Perf Counter fix & User Impersonation - KB979917
This is a hotfix for 2 Asp .Net issues :
Issue 1
You deploy some partially trusted Web parts on the SharePoint site. These Web parts have more permissions than they should have. This issue may create a security risk on the SharePoint site. For example, these Web parts may generate database requests or HTTP requests unexpectedly. This behavior creates a security risk.
Note:
Partially trusted Web parts are Web parts that are deployed to the Bin directory of a Web application.
Issue 2
The "Requests Queued" performance counter in an ASP.NET performance object functions incorrectly. When you run the SharePoint site, this issue may decrease the performance of the SharePoint site.
I read the following in the Hotfix documentation, so I wonder if we have to really install it or test SharePoint behavior first.
"A supported hotfix is now available from Microsoft. However, it is intended to correct only the problem that is described in this article. Apply it only to systems that are experiencing this specific problem. This hotfix may receive additional testing. Therefore, if you are not severely affected by this problem, we recommend that you wait for the next service pack that contains this hotfix."
Anyway; here is the link to this hotfix :
8.5 hotfix for the token authentication in WCF
9 Microsoft SharePoint Server 2010 Installation
9.1 Installing the SharePoint Prerequisites
Double click the installation package to launch the installation of Microsoft SharePoint Server 2010

The SharePoint 2010 installation Wizard is opening

Click the "Install Software Prerequisites" in order to update, complete and check the previous preparation described in the previous sections of this post. The Microsoft SharePoint Product and technologies 2010 Preparation Tool is opening

Accept the licence agreement

The prerequisites are being installed
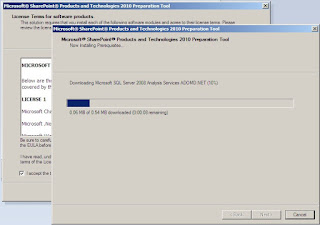
You should obtain this screen if you followed the operations previously described in this post.

8.2 Installing the SharePoint Files
Back to the SharePoint 2010 Installation wizard, click the "Install SharePoint Server" link. The launched wizard requires the product key.

Then, accept the terms of the licence agreement.

Choose the complete installation

While SharePoint is being installed, notice that a 14 repository is now created where we had the 12 for the 2007 version.
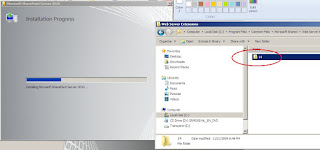
The wpressources repository is created beside the 14.

When the installation of the SharePoint files is finished you are asked to continue with the SharePoint Products Configuration Wizard.

Do not continue with the Wizard but cancel it otherwise you will have an issue due to the current installation described in this post.
In the SharePoint 2010 version, you are not allowed as before to mount a Farm installation on a single machine using local accounts.
If you had continued with the wizard you would have been stopped in the configuration by the following issue:
the specified user Administrator is a local account. Local accounts should only be used in stand alone mode.

Fortunately there is a workaround to succeed in obtaining a Farm environment using local accounts as we used to have in the previous version that I have found in this post:
I will show it bellow, but first of all, let us create the sevice accounts we need for this.
9.3 Creating several service accounts - about least priviliege administration policy
In the post concerning the Installation of the SharePoint 2010 Beta version, I used a single local account that was local administrator of the machine, but for this installation, I have chosen to use 3 local accounts in order to be compliant with the least priviliege administration policy.
This policy requires service accounts not to be administrator of any server of a farm, and that each service or process runs using a distinct account.
I advice to do it not only for the QA or production environement but also for development environment, and this for two reasons:
- First, doing this will help you to debug because the traces of errors in the SharePoint log or in the event wiever sometimes report the name of the involved account and it will be easier to debug an issue if you have a precise information and not always a reference to the unique "Administrator" local account.
- Second, using the same system of accounts within the development machines and the QA and production ones can help you to prevent some bugs. Some bugs are due to the fact that the security used for service accounts are different on the development environment and the QA and production ones. So it is better if a bug linked to this security configuration occurs in your development machines than in the QA or worse in the production environement.
For these two reasons, thus, I personally think it is a good practice to have the same service accounts configuration in all your environments even on the development ones.
Regarding the least priviliege administration policy, The minimal SharePoint installation requires us to create 2 more local accounts (we already have "administrator" account for installation):
- One is for the process of the IIS Application Pool of the central administration. Assume we call it SPS_Farm
- The second will be used for the process of the IIS Application Pool of the first Web Application if it is isolated in its own Application Pool. Assume we call the first Web Application WebApp-80 because it will use the 80 port, let us call this account SPS_WebApp-80.
So let us create these two accounts and configuring them in order password never expires.
9.4 Using SharePoint 2010 Management Shell to create the SharePoint 2010 Configuration databases
Open the SharePoint 2010 Management Shell.

Type the following command
New-SPConfigurationDatabase
run the command by pressing the Carriage Return Key

The Shell willl ask you for:
The database name --> choose any name, for example SharePoint_Config
The database Server name --> type the name of your Virtual Machine in my case VMDEV-012
You will be then prompt for the system account credential. It is now the time to pass the credential of the SPS_FARM service account. Don't forget the machine (domain) name otherwise you will get an exception of the SharePoint shell.

Then you are asked for a passphrase. You can use
P@ssw0rd that matches the security policies required.
(This passphrase will be asked when you will add a new server to the SharePoint Farm)

At this step of the installation you can check that two operations has been performed behind the scene.
Two databases has been created in the database server referenced in the shell window. There is at this point no difference with MOSS 2007 instalation.

3 web services has been created in IIS with 3 distinct application pools for each. That is a new feature of SharePoint 2010.

For more information about installing SharePoint 2010 in a production environement while being compliant with the least privilege administration policy, read this excellent post (especially the comments discussing and explaining the workaround about the "SPS_Farm" Database Access Account).
Least Privilege Service Accounts for SharePoint 2010
Here are the official Microsoft documentation links on the topic:
9.4 Running the SharePoint Products Configuration Wizard
This time you can open the SharePoint Products Configuration Wizard.

Let the option "Do not disconnect from this server farm" checked.

Then you will be prompted to chose the Central Administration Site port number. I personally always use 55555 for the configuration of all my development environments in order to type the same Url on all my Virtual Machines.
Let the default NTLM value for the "Authentication provider", Kerberos requires network configuration we cannot perform in the current environment anyway.

The wizard, then, summarize your choices.

Then the 9 main configuration operations are performed.

Finally, the "configuration Successful" dialog summarizes your configuration again and informs you that the central Administration of SharePoint 2010 will be launched when you close it.

When you click "Finish" to close the wizard, the Central Administration Site is opening, and you are prompted for credentials

Then you are asked to sign up to User Experience Improvement Program.

Another page let you choose between configuring your farm yourself or by using a wizard.

When this choice is made, you display for the first time the brand new Welcome Page of SharePoint 2010 Central Administration.

As there is sometimes concern with the SharePoint Services installation with Windows 2008 Server R2, you should check that the services installation has completed successfully.
On SharePoint 2010 Central Administration Home Page under the System Settings section click Manage services on server.

You should see this screen that confirms that SharePoint Services installation has completed successfully.

10 Creating your first site in Microsoft SharePoint Server for Internet Sites Enterprise 2010
10.1 Creating a managed local account for SharePoint 2010
Now we have to perform operations in order the previously created local account SPS_WebApp-80 be referenced as a managed account by SharePoint 2010.
So reopen the SharePoint 2010 shell windows and type the following:
$myWebAppServiceAccount = Get-Credential VMDEV-012\SPS_WebApp-80
You will be prompt for this account credentials:

Then, type the following
New-SPManagedAccount -Credential $myWebAppServiceAccount
The SharePoint 2010 Managemant Shell warns you that the managed account should be use in stand alone environement since it is a local account.

Now, we can create the first SharePoint 2010 Web Application
10.2 Creating your first Web Application for SharePoint 2010
On the default page of the SharePoint 2010 Central Administration, click the "Manage Web Application" link in the "Application Management" section

On the "Manage Web Application" page click the "New" menu entry then click "New Web Application"

I have personally chosen to create it on the default IIS web site, and as a personal usage
named it "Web App - 80"
let the Application pool default settings
named the content database "WSS_Content_WebAppp-80"

You notice then that you have the previously service account available as a SharePoint 2010 managed account to be the account under the which the process of the new Application Pool will run .

You are then prompted the changes are processed

and finally that the SharePoint 2010 Web Application is created.

Click "OK" to close the wizard and to be taken back to the Web Application Management Page where you can see the new SharePoint 2010 Web Application.

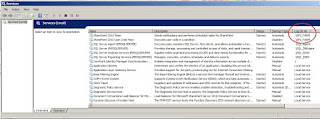
Now, if we go to check what have been done behind the scene in ISS we will notice that we can retrieve a trace for our SharePoint 2010 managed local accounts:

And the same in the Services of our machine:
Last, if now you use the SPS_FARM SharePoint 2010 managed local account to sign in to the Central Administration:


You will notice that you are not connected as SPS_Farm, but as System Account.

This account is a Farm administraor account used ONLY to administrate the Farm using the Central Administration Web site. As it is not a local administrator of the server it cannot be used to run the SharePoint 2010 Configurqtion wizard, neither the obsolete stsadm or psconfig tools, nor the SharePoint 2010 management shell. And there are operations that are no more available from the central administration web site when you are logged in with this account, as "Manage Services on Server".

10.3 Creating your first Site Collection for SharePoint 2010
From the Central Administration Home Page, click on "Create site collections" in order to proceed to the creation of your first SharePoint 2010 Site Collection.

Then, click the "Create site collections" link under the "Site Collections" section. You are taken to the "Create Site Collection" page.
I have personally chosen to create a team site called "SharePoint 2010" team site"


When launching the creation, you are prompted the changes are processed

then prompted on that the site was created successfully.

When clicking on this site link, you can display your first SharePoint 2010 site.

Well done !


 !
!